The skills our grandfathers took for granted have stopped being passed down. Here’s how to start passing them down again, one age and one project at a time.
There’s a quiet thing that’s happened in American households over the last two generations.
Most fathers under 50 today were not, themselves, taught to use tools by their fathers. The skills broke somewhere around the 1980s, when furniture got cheap, when sheds got pre-built, when mechanics got too computerized to fix in the driveway. The dads of the 1990s grew up with hands that didn’t know what their grandfathers’ hands knew. And those dads — who are now grandparents — passed that gap on to today’s parents.
The result is what you can see in any backyard in America: a 12-year-old who has never held a screwdriver, a 9-year-old who has never measured anything with a tape measure, a 7-year-old who has never put two pieces of wood together with their own hands.
That’s not a moral failing. It’s a generational drift. But it’s also something you can simply decide to fix, starting this Saturday, regardless of how good or bad you are with tools yourself.
This is a practical guide to passing down the skills that used to pass down naturally. Organized by age, with specific first projects.
The Underlying Idea
Before the ages, one principle.
Children don’t learn skills by watching. They learn by holding the tool.
This is the part most parents get wrong. Kids will watch you hammer a nail for forty minutes and remember nothing. Hand them the hammer for two minutes — even if they do it terribly — and the wiring in their brain rearranges permanently.
The job of the parent is not to demonstrate. The job is to let the kid hold it badly until it gets better, while making sure nothing dangerous happens.
Patience and proximity. Those are the skills the parent needs. The child supplies the curiosity.
Ages 4–6: The Foundation
This is the age when “tools” should mostly mean a small kit of safe items that lets the child mimic the adult.
What’s appropriate:
- A small rubber or wooden mallet (for hammering wooden golf tees into a soft-wood block)
- Plastic or rubber-tipped screwdriver and oversized wooden screws
- Small hand-sandpaper blocks (for sanding a piece of pine — they’ll love this)
- Tape measure (purely for measuring stuff around the house, not for any project)
- Crayons and pencil for tracing or marking lines
What’s not yet:
- Anything sharp (real screwdrivers, knives, scissors with metal points)
- Anything battery-powered
- Anything that can pinch, drop, or break
Best first projects:
- Tap golf tees into a wood block. Cheap pine 2×4, drill small starter holes, give them a mallet, watch them disappear into the project for an hour. The proudest 5-year-old you’ve ever seen.
- Sand a small board smooth. Hand them sandpaper, show them direction (with the grain), let them go. The board doesn’t need to be for anything. The point is the rhythm of the work.
- Measure the rooms of the house. Hand them a tape measure. Have them write down “kitchen = ___ steps long, ___ inches wide.” This builds the concept of measurement before they need to use it for real.
The goal at this age: the child develops a relationship with the idea of working with their hands. That’s it.
Ages 7–9: The First Real Tools
Now they can hold real tools, supervised, with appropriate scale.
What’s appropriate:
- A small claw hammer (8 oz, child-scaled)
- A real Phillips and flathead screwdriver
- A real tape measure (the same one you use)
- A small hand saw with a child-friendly handle, with constant supervision
- Sandpaper of multiple grits
- A small workbench or sturdy table at child height
Skills to introduce at this age:
- Measuring and marking a line with a pencil
- Driving a real nail (with you holding the wood for them)
- Driving a real screw with a manual screwdriver (battery-powered comes later)
- Sanding edges smooth
- Reading a simple diagram or drawing
Best first projects:
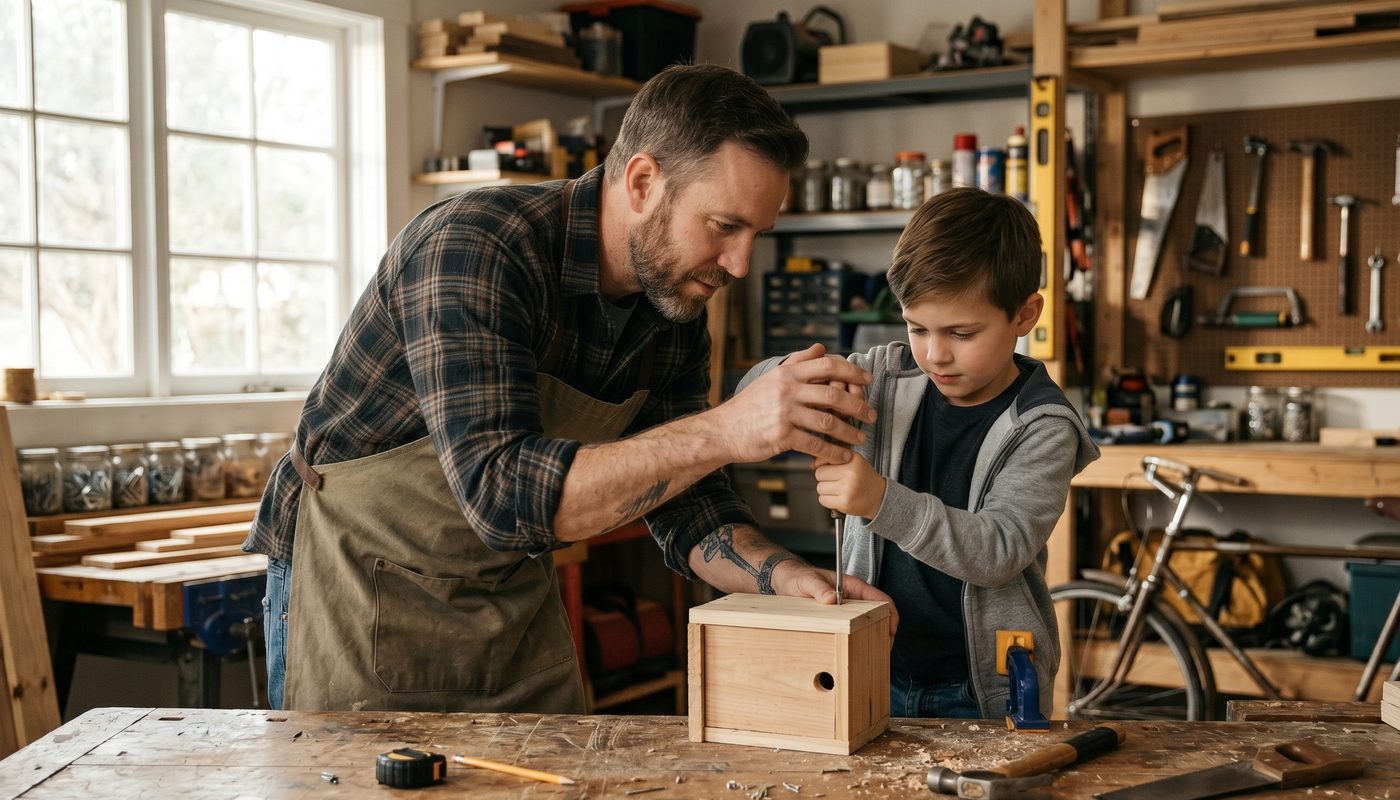
- A wooden birdhouse. Pre-cut pieces from a kit, but they do all the assembly. Three to four hours, two sessions. They will hang it in a tree and check it daily for the rest of the spring.
- A simple shelf for their bedroom. Two L-brackets and a piece of pine. Measure, mark, drill (with you), screw, mount. Done in ninety minutes. They will put their best three toys on it and tell every visiting relative they made it.
- A small wooden box. Six pieces of wood, glue and nails, sandpaper. The box doesn’t have to be perfect. The pride at “I made a box” lasts for years.
The goal at this age: the child develops the muscle memory of basic woodworking and the confidence that their hands can make objects exist.
Ages 10–12: The Real Apprentice Years
This is the golden age. Old enough to handle real tools safely. Young enough to still want to be near you. Curious enough to ask “why” instead of just “okay.”
What’s appropriate:
- A small cordless screwdriver (with adult turning it on for the first few uses, then independent)
- A real hand drill or small cordless drill
- Hand saws (with full demonstration of safe technique)
- Files, rasps, basic chisels
- Multi-bit screwdriver
- Sliding combination square
- A small starter set of clamps
Skills to introduce at this age:
- Drilling pilot holes
- Using a level and a square
- Reading a basic project plan or set of instructions
- Cutting a straight line by hand (with practice)
- Following a multi-step process without losing track
- Recognizing when to ask for help (and when to figure it out)
Best first projects:
- A simple workbench, scaled to their height. Six pieces of 2×4, plywood top, a few hours over a weekend. They will use it for the next three years and feel pride every time.
- A planter box for the garden. Real measuring, real cuts, real assembly. Mom hangs it in the kitchen window and tells everyone the kid built it.
- The first “with you” weekend project. Something where you decide, together, that you will both work on it — not you doing the project while they help, but you both contributing as partners. This is the milestone year.
The goal at this age: the child becomes a real apprentice. They graduate from helping to actually working.
Ages 13+: Independence
After 13, the child should be capable of taking on a project from start to finish, with you available as advisor rather than active participant.
What’s appropriate: essentially the full toolkit, with safety habits trained.
Skills they should have by 16:
- Reading and following any basic project plan
- Choosing the right tool for the job
- Working safely with power tools, with clear understanding of the dangers
- Recognizing when a project is beyond their current skill (and being okay with that)
- Finishing a project they start
Best projects in this range:
- A bookshelf for their own room. Their design, their measurements, their build. You buy the wood; they do everything else.
- The first significant outdoor project: a planter, a garden gate, a fence panel, a simple shed. Something visible, something the family uses, something the neighborhood sees and the kid can point at.
- Helping a grandparent or neighbor. Repair a broken porch step at grandma’s house. Build a gate for the neighbor. The shift from “doing things for myself” to “doing things for others” is the final stage of the apprenticeship.
The goal at this age: the child becomes a person who can build things. Period. The thing your grandfather was. The thing the world quietly forgot to make most kids into.
A Word on Daughters
We have written this article using “child” because everything in it applies regardless of gender, but it’s worth a specific note.
Most American girls are still not taught to use tools at the same rate as boys. This is changing — slowly — but it’s still the norm. If you have a daughter, she will get more out of being included in this process than a son will, simply because almost no one else is offering it to her.
The world is full of women who, at 35, realize they have lived their entire lives unable to hang a curtain rod. They didn’t choose this; they were never offered an alternative. Offer it to your daughter. Watch what happens.
When to Step Back
The single hardest skill for the parent is knowing when to stop talking and let the child fail a little bit.
A nail that goes in crooked. A line that’s an eighth of an inch off. A board that’s slightly too short. A drill bit that walks because they didn’t punch a starter hole.
These are not problems. These are how the skill actually develops. If you correct everything in real time, the child never builds the internal feedback loop that says “wait, that doesn’t look right.” That feedback loop is the actual skill — not the technique.
Let them be wrong for a few minutes. Then ask, gently, “what do you think happened there?” Most of the time, they figure it out themselves. That’s the moment the skill becomes theirs.
When You Don’t Know How
Many parents reading this are aware that they themselves were never taught these skills. That’s the elephant in the room. How do you teach your kid something you don’t know?
A few honest answers:
You learn it together. This is, frankly, the most powerful version. A child watching their parent learn something — and watching the parent be okay with making mistakes in front of them — is one of the most meaningful experiences they can have. It models what learning actually looks like.
You start smaller than you’d think. You don’t need to know how to build a deck. You need to know how to drive a screw. You can learn this in ten minutes from a YouTube video. From there, the next thing builds on the previous.
You pick a project that forces both of you to grow. A shed, a workbench, a planter, a simple piece of furniture. Something with a real plan you can follow together. The kind where, by the end, the parent has also learned something they didn’t know on Friday.
We’ve written before about a father-son weekend that started exactly this way — a dad who wasn’t sure he could build a shed, his son who’d never used a tool, and what happened when they tried anyway. Worth reading if you’re at the start of this and feeling unsure.
The Final Thought
The skills we’re talking about — measuring, cutting, joining, fixing, building — are not just practical. They are how children develop the deepest version of self-confidence: the confidence that they can affect the physical world.
A child who has built something with their own hands knows, in a way that no school grade can replicate, that the universe responds to their efforts. They learn that boards do what nails tell them to. That straight lines come from careful work. That broken things can be fixed. That a clumsy first attempt becomes a clean second attempt becomes a confident third attempt.
These are not woodworking lessons. They are life lessons that happen to come wrapped in sawdust.
Pass them down. Even imperfectly. Even when you yourself are still learning. Especially then.
Your child will remember the Saturdays you spent building things together for the rest of their life. They won’t remember the screen time you let them have on the same Saturdays.
Make the trade.
Prepared Family Press publishes practical guides for American families. We believe the skills that hold a household together are the skills that should pass down through it — and that the people who keep them alive are the parents who decide, on an ordinary weekend, to start.
1 thought on “Teaching Kids to Use Tools: A Practical Age-by-Age Guide”
Comments are closed.